Showing posts with label facebook. Show all posts

Saturday, April 21, 2012

7 Tips For Big Marketers To Increase Social-Media Marketing ROI


This article is by V. Kumar, Ph.D., Richard and Susan Lenny Distinguished Chair Professor of Marketing and executive director at the Center for Excellence in Brand & Customer Management, and director of the Ph.D. Program, J. Mack Robinson College of BusinessGeorgia State University,Atlantawww.drvkumar.com
Image representing Facebook as depicted in Cru...
Image via CrunchBase
Whether or not to engage in social media marketing is hardly a question in today’s world. Anyone wishing to sell a product, a service, or even an idea would not question the need for engagement.  Social media made Kim Kardashian and destroyed SOPA. It made the uprisings in Egypt possible and the elimination of Occupy Wall Street impossible. It’s no surprise, then, that marketers have recognized the power of social media in connecting with their target customers and creating an engaging brand experience online.


Accordingly, there has been a shift in marketing dollars, with many companies now focusing at least part of their marketing efforts on some aspect of social media. Larger companies in particular, because of their market position and access to resources, are best positioned to reap all the benefits of a well-conceived and well-executed social media marketing campaign.
But  one great question remains.  Instincts aside, is it really possible to measure social media results?  Budgeting is a quantifiable science, however, social media measurement remains the last big question when deciding how to allocate marketing dollars. Companies need not just a social media campaign, but a measurable, optimized social media strategy to support their marketing efforts.
With a mix of creativity and marketing science, we have developed a seven-step framework for big-budget marketers to measure social media return on investment (ROI), and the value of a customer’s word-of-mouth (WOM).  For example, Procter & Gamble is about to launch a new form of laundry detergent and wants to generate buzz for the detergent via social media.  Even this giant among CPG companies needs to put some metrics around its efforts.  By executing the following steps, P&G would not only bring more awareness to the brand, but also be able to measure the ROI and the share of total growth in sales.
1. Monitor the conversation.
If P&G wants to determine the potential for influencing purchase decisions on social-media platforms, they must first monitor the platforms such as Facebook and Twitter to see what potential consumers think and talk about the brand.
2. Identify the “ideal” candidates who can spread your brand message.
P&G would need to figure out what makes their ideal candidates ideal; living in the same geographic location, using the same platform as others, the number of people they are connected to in the network, etc.
3. Identify the influential characteristics that make up an “ideal” candidate.
P&G’s ideal candidates would need to have a high ability to influence their social network. For example, when a message is sent, the receiver should see it and also forward it in addition to posting comments about it.
4. Use the influential characteristics to locate all of the influencers.
P&G would then use the identified characteristics to find similar influencers within their chosen social-media platforms to select potential brand ambassadors.
5. Enlist the identified influencers to spread positive word-of-mouth (WOM)
P&G would develop interactive online content specific to the product that is being launched. This content would be used to promote positive WOM from influencers and allow their messages to be tracked and measured for its influence (for example, creating online games).
6. Use the candidates in a social-media campaign to talk about your brand.
P&G’s social-media campaign would incentivize influencers who would promote the spreading of positive WOM to customers, prospective customers and other potential brand ambassadors.
7. Evaluate the performance of your social-media campaign.
Last, but not the least, P&G would assess the successfulness of the campaign based on their chosen key metrics such as ROI, sales revenue and brand awareness. Our implementation of this framework with an ice-cream retailer—HokeyPokey–has shown that social media can be used to generate a 40% share of the total growth in sales, 83% increase in ROI, and a 49% increase in brand awareness in addition to inducing more positive word-of-mouth.
As social media channels continue to explode, and the urge to exploit them continues along with it, the need to develop measurement tools
Dr. V. Kumar
becomes ever more important. The steps outlined here form the basis for cogent social-media measurement for marketers from P&G to the local coffee house, and everything in between. Social media is certainly here to stay, and finally, so is the ability to effectively assess the performance of a social media marketing campaign.
Source: Forbes.com


Wednesday, April 11, 2012

How to Increase Businesses with Starting YouTube Videos

Making videos, much like Facebooking, blogging, and tweeting, is not an end but a means. It is a means of communicating with customers and marketing your wares. And it is increasingly a means of promoting yourself more visibly via search engines. On many a Web search, Google will place videos at the top of the results. This is common for many terms, and some have suggested that Web pages that contain embedded videos place higher in Google’s search results.


For the vast majority of businesses, producing and distributing videos is probably not a natural activity. Yet, while calculating the hard ROI of online video is a fool’s errand, the data suggest that video adds real value--and potentially lots of it--because users really do watch the stuff. RevZilla, a small motorcycle gear store in Philadelphia, jumped into YouTube on a whim in 2009; since then, its videos have received over 4.1 million views.

What Kind of Video to Shoot

Once you’ve decided to get your small business into video, what kind of videos should you make? Consumers are interested in the inner workings of corporate America, as TV shows like How It’s Made, Undercover Boss, and Dirty Jobs prove. You may think your business is boring, and it very well may be. But there’s literally nothing that can’t be peeled back, expounded upon, or satirized for entertainment gold. (Consider a long-running sitcom like The Office if you don’t believe me.)

If you’re still having trouble thinking of something, remember that your video doesn’t have to be a true story. For some inspiration, check out Orabrush, which makes tongue cleaners and which has used YouTube to grow into a $10 million business.

The Key: Be Funny

If there’s a single takeaway from most companies’ success with online video, it’s that humor works: Funny videos are the biggest overnight YouTube hits. Consider your own video-viewing and -sharing habits; would you rather share a recorded PowerPoint presentation, or the commercial below, for California taxidermist Chuck Testa?


So, how can you use comedy to promote your presumably serious business? A coffee shop could create a highlight reel of awful open-mic performances, or create a hoax cooking show. A jeweler could make a faux Home Shopping Network segment, complete with callers dialing in. A corporate branding expert could stage a product-name brainstorming skit in a conference room, Mad Men-style. All of these can serve as a call to action to viewers to become a real customer.

Blendtec has made a cottage industry--190 million views and counting--out of grinding up iPhones and other otherwise nonblendable objects. The recent overnight phenomenon Dollar Shave Club, below, matches laugh-out-loud comedy with a compelling business case.


asasa


Of course, you know your customers best, and how far you can push comedy, satire, and self-deprecation. Kick back over pizza with trusted colleagues and brainstorm; the ones that make you laugh most are probably the ones to pursue first.

Or Don’t Be Funny

Okay, maybe you don’t have a knack for humor. Videos don’t have to be funny to be successes. You might have legitimate reasons to explain, soberly, how a product works or to prove your company’s expertise as, perhaps, a first-aid services outfit (where too much humor might be seen as cavalier). Gary Vaynerchuk’s long-running (now inactive) Wine Library TV turned him into a worldwide sensation, despite largely featuring a guy drinking wine in front of a wall.

Making the Video: Think About the Audience

YouTube shows you who's watching.
It’s been said that you don’t choose your audience; your audience chooses you. To some degree that’s true, but you can still guide the kind of viewer that you most want to reach: your ideal customer, naturally. Have a handle on what this customer looks like, demographically speaking, and write down a customer profile: Is she a 29-year-old urban fashionista? A suburban older man facing retirement?

YouTube provides demographics about viewers, so if you find a video that you think would resonate, check out who’s watching it. To reach YouTube Analytics, on any video just click the small graph button to the right of the number of video views. You’ll see when the video has been viewed; where the traffic came from; and the age, gender, and location of the audience. Use this data on your own videos, of course, to confirm whether you are reaching the audience you intended, and to help your next production.


Writing a Script

Once you’ve conceived your video thematically, it’s time for the hardest part: Writing the script. It’s a terrible idea to take a camera and just start shooting, figuring that you’ll edit the footage together into something funny later. The best viral videos are tightly scripted productions that were agonized over until they were perfect. They may come across as spontaneous and improvised, and that’s intentional.

The good news: The best videos are short. Audiences have very limited patience for Web video, so keep yours under 90 seconds long, and the shorter the better. You’ll be able to cut in postproduction, but you’re best off planning a brief video during the writing process.

Shooting a Great Video

Need help shooting your first production? Don’t forget these tips.

First, shoot in high definition, and in widescreen if you can.
As with still photography, lighting is everything. Pay careful attention to the lighting to avoid harsh shadows and dimly lighted environments. Take test shots to get a sense of how the video will look after it's made: What might seem perfectly bright to your eyes often looks impossibly dark on video.
While lighting is everything, sound is everything else. If you can’t afford a boom microphone, try to shoot in otherwise quiet locations, and avoid shooting outdoors on windy days. Your camera’s microphone is just as important as its lens.
Don’t be afraid of multiple takes. Use a real Hollywood-style clapper, if you’d like, to mark, at the beginning of each scene, the chronological number of each take, and have someone on hand to keep notes on which takes worked best to save you time in the editing process.
Shoot with a tripod. If you don’t have to move the camera, don’t.
Leave the zoom lens alone. Zooming in and out a lot is the first sign of an amateur production and a quick way to turn viewers off. If your shot absolutely needs to move, move the camera by physically moving in and out, and leave the zoom lens out of it.
Don’t shoot your video using your phone's camera. Use a real video camera if at all possible.
Edit fast and heavy: Get your video down to the shortest possible length, and cut out every last frame that doesn’t have to be in the finished product. You want your video to move, to be urgent, and to leave your audience with a smile or a laugh, not a sigh that you’ve overstayed your welcome.
Use overlays to add information about your company at the end of the video (or throughout the clip): your website, phone number, email address, or physical address--whatever’s most appropriate for your business. Other than this, ignore all the other “special effects” your editing software or camera may offer.

Polishing Your Video

Once your video’s done, polish it for publication and consumption. First, make sure you have a Channel. All YouTube accounts automatically have a Channel associated with them, which you can customize by clicking the Edit Channel button on your Channel’s home page. Here you can promote a featured video, connect to social networks, and add links to your business’s website. You can get fancy with a corporate logo and custom background, too; the more branding, the better.


When you upload your video, use the same guidelines as you would for creating any page of content on the Web. Thoughtfully use the keywords you want to optimize for, add descriptions, and check your spelling. Don’t spam the fields with excessive keywords, but be savvy about the use of synonyms that searchers might type when searching for content like yours. YouTube suggests popular terms once you start typing inside its search box.

Adding captions or subtitles to your video is a great idea (Google explains how), not just for accessibility for the hearing impaired but for SEO purposes, too. It shouldn’t take more than a few minutes to caption your video if you’ve kept it short.

Also, if you’re making video an ongoing project, invite viewers to subscribe to your Channel. Subscribers get new videos sent directly to their home page, making this one of the best ways to keep fresh content in front of your audience.

Promoting Your Video

Finally, a great video is useless unless you promote it properly, so rally your other social networking connections to get the word out. By now you know the drill: Use Twitter, your Facebook pages, Google+, and even LinkedIn to tell the world to check out your creation. You’ll want to embed videos directly on your own website, too. If you’ve made your video genuinely entertaining (test it out on a few friends), you can try to take it viral through submissions to StumbleUpon, Reddit, Digg, and other social news sites.

If you aren’t getting the eyeballs, you can promote your video with Google AdWords for Video (now being beta-tested and launching to the public this spring). Video ad campaigns work the same way that text ads work, by letting you bid on keywords and pay-per-view. YouTube explains how the system works here and in the video below.

Written By: Christopher Null Source: PCWorld.com

Friday, March 16, 2012

21 Key Points Must Know Marketers - Facebook Timeline for Business Pages

If you have not yet converted your Facebook fan page over to the new Timeline design, your page will automatically convert on March 30th, 2012 which is coming up fast. This post covers the majority of basic settings and features you need to know. Even if you’ve upgraded, you’ll find some tips here!
First, review this marked up screenshot for a tour of most of the features — click the image to view full size (you may need to click again on the image on the next page):
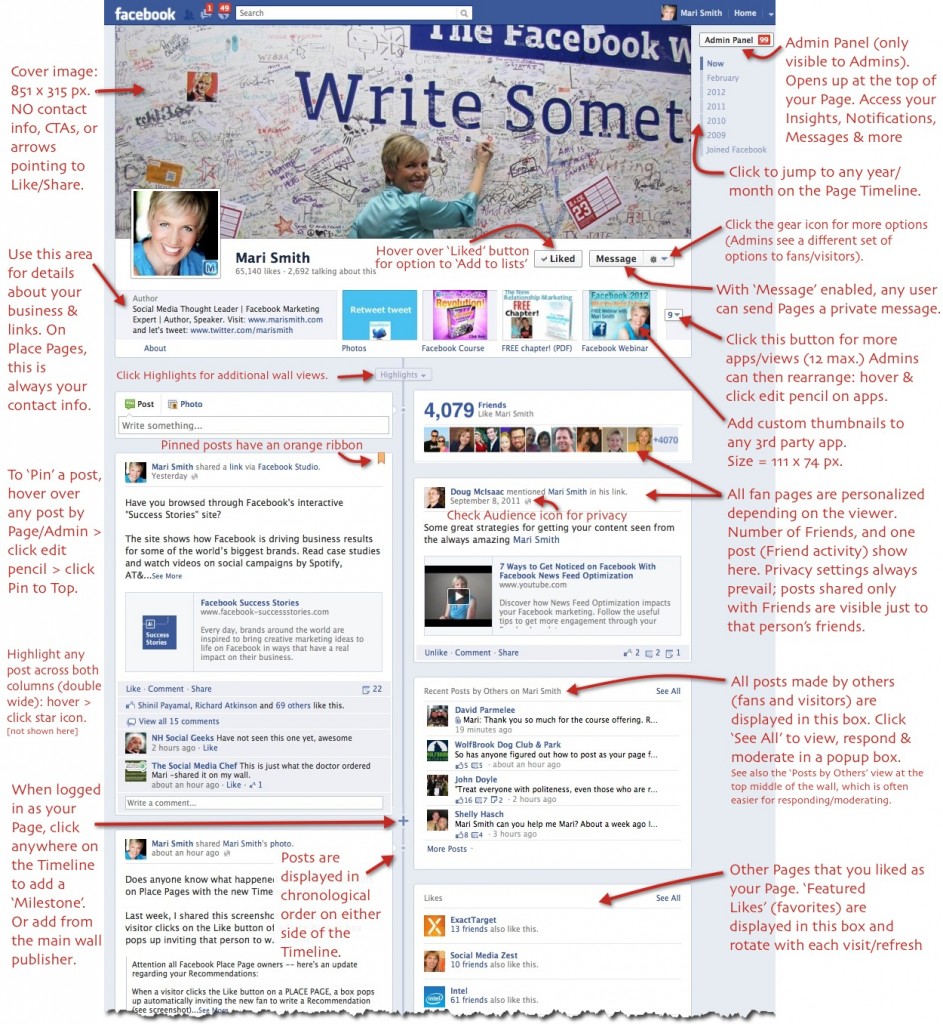
Facebook Timeline for Pages - Guide
Facebook Timeline for Pages - Guide (click to see full size)

Cover image replaces default landing tab

One of the biggest feature changes that many businesses are upset about is the removal of a default landing tab. That is, where you can create a custom landing page for non-fans using an iFrame app, and add rich media, an opt-in box and/or a compelling reason to join your fan page. In addition, many businesses made use of the “like-gating” or “fan-gating” feature on these default custom landing tabs where you could entice your fans to click the Like button and then reward them with a special benefit such as a coupon code, or unique content just for fans.
The good news is you can still have custom tabs, plus the like-gating element still functions. You just can’t set a default landing tab. However, each of your apps still has its own unique URL. That means you can drive traffic to any “landing” page you wish – from within Facebook via ads, your profile and other places as appropriate; and from outside Facebook on your website/blog, other social profiles, tweets, email campaigns, email signature files, and so forth.
With the new Timeline design, you’ll notice the generously large cover image at the top of your page. You may find that you care less and less about a default landing tab with this piece of prime real estate that is always visible to fans and non-fans as they land on your page. The dimensions are 851 pixels wide by 315 pixels high. It’s a wonderful place to showcase photographs and graphics pertaining to your brand/business. Personally, I’m very excited about the cover image! The possibilities are endless… even with the tight rules around what content cannot be placed on cover images (see key point #4 below).

21 Key Points To Know About Timeline for Pages

To keep you on track with the change, here’s a list of 21 key points about the new Timeline design:

1. Preview

You have a chance to preview your page(s) first, made all the edits you wish, get it just the way you want it, then publish. Look for the preview option at the top of your page in the old design. Or, see a list of your pages here and turn on page preview mode. Before you publish, at minimum just have an attractive cover image loaded.

2. March 30

Your page will automatically convert on March 30. My advise is don’t wait. There really is no strategic advantage to waiting … okay, maybe if you have a really hot custom landing tab with a like-gating campaign that’s going extremely well. Otherwise, go for the upgrade now and lead the way by educating your fans on all the new features.

3. Cover Image

Dimensions for the large cover image is 851 x 315 pixels.  If you upload an image that’s smaller than these dimensions, it will get stretched to this larger size. The image you upload must be at least 399 pixels wide. Facebook encourages you to change your cover image as often as you wish. Newsflash: each time you change your cover image, this posts on to your wall and goes out into the news feed of your fans. You may find the activity itself doesn’t get great Edgerank (visibility score in the news feed). So, what you can do is hide the activity on your wall, then share the new cover image with a call to action in the textual area, e.g. We’re celebrating 10,000 fans today and just changed our cover image in honor of all of You! Click like if you like! :) (To be clear, that message does *not* go ON your cover image itself. You’re posting your cover image on your wall with the message as a description.)

4. Image rules

Do not put contact info, calls to action, or arrows pointing to the Like or Share button on your cover image. See the Page Guidelines here. Contact info should go in your about section. The no calls to action rule is likely because Facebook has been very generous with this large piece of real estate … however, the company does not want us to run hogwild with all manner of promotions and campaigns for free! Those come at a price and are called Facebook ads! And the new Premium Ads and Reach Generator. And, the one I’m most excited about: Offers (that one is actually free to set up, though currently only available to large brands).

5. Profile picture

Your profile picture is always a square and is displayed at 125 x 125 pixels or 150 x 150 pixels, depending on the size of someone’s screen. The photo you upload must be at least 180 x 180 pixels. Facebook discourage page owners from changing their profile picture that often. This is the primary, instantly-recognizable image that tracks you throughout Facebook wherever your posts go and wherever you comment as your Page.

6. Landing tab

You can no longer set a default landing tab. Make good use of the cover image, instead (see #3 above) and the three main apps (see #8 below). Plus, drive traffic to whichever tab you wish (see #7 below).

7. App URLs

Custom apps all still function, including the fan-gating feature. Each tab/app still has a unique URL so you can drive traffic from inside or outside Facebook to any ‘landing page’ you wish.

8. Showcase apps

Just below your cover image, your ‘tabs’ are now displayed as apps or views. You can have a max of 12, though only four are always on display. The first one is always Photos and cannot be moved. ‘Views’ are Facebook’s default apps or features such as Photos, Events, Likes, Notes, Map. Apps are all third party apps.

9. Custom thumbnail

You can add a custom thumbnail image to all your apps. The dimensions are 111 x 74 pixels. These are great areas to get creative and add seamless branding, calls to action, and specials. To add/change a custom thumbnail, first expand all apps by clicking the small down arrow to the right of the four app display. Then hover over any app > click the edit pencil > click Edit Settings > click Change next to Custom Tab Image (opens in a new window) > click Change > upload an image. Voila. The image loads and saves right away. (I have noticed bugs with this feature and have often seen other pages’ thumbnails appear… you may need to upload a couple times to get your image to stick!).
My Irish and Scottish friends across the pond have done a super job of their Timeline branding on Social Stars – the image below shows their creative use of the custom app thumbnails. But do check out their cover image, too. It’s one of my favorites!
Social Stars - Custom App Images
Custom App Thumbnail Images on Social Stars UK Fan Page

10. Liked button

The like button now tuns to “liked” when clicked. Users can HOVER for options, including adding to an Interest List(s). The Liked button is a great new feature as it visually informs fans that they have already liked the page. However, the hover feature and ability to add pages to Interest Lists is very new and really not obvious at all. (See #11 and my next blog post!)
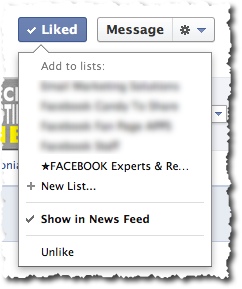
Facebook Liked Button Options
Facebook Liked Button - Options on Hover

11. Interest Lists

Encourage your fans and visitors to add you to an Interest List; let them know which topic is best, e.g. my Page would be best added to a list called Facebook Tips, or Facebook Marketing, or Social Media Marketing. (Interest Lists are brand new as of March 8th. More on the new Interest Lists in an upcoming post! Speaking of lists, please do subscribe to my popular Facebook Experts and Resources list, with 77 people and pages and currently over 800 subscribers.
Got Facebook questions? Come join my community of over 260,000 fans and subscribers! Just click the Subscribe and Like buttons below to connect with me on Facebook!


12. Milestones

You can go back in time to add business milestones on your Timeline. When you do, these will post at the right date, and go out into the news feed of your fans and create more visibility and engagement. The full extent of the actual timeline element of the Timeline design is geared toward what Facebook calls “Legacy Brands” – those brands with historical data spanning decades that they’d like to feature.

13. Wall Filters

Page walls now have four filters: Highlights, Posts by Page, Posts by Others, and Friend Activity. There is no way to set the wall to be posts by everyone. The default is always Highlights. In your page settings (Admin Panel > Manage > Edit Page > Manage Permissions), you can choose to not let anyone write on your wall, or to not display Posts by others. However, I recommend that you leave the settings on to allow everyone to write on your wall, everyone can add photos and videos, and show the box for Recent Posts by Others.

14. Pin posts

Any post made by the Page can be pinned the top of the wall for up to 7 days. I suggest rotating which posts are pinned and not letting any post sit there for longer than 1-2 days. You never know how many repeat visitors are coming to your Page and you want to keep it fresh for them.
Enjoying this post? Tweet to let me know – just click the button below (opens in a popup, you’ll have a chance to see and edit the tweet!):


15. Highlight posts

Page admins can choose to display any post made by the Page or by others as ‘double wide’ – meaning the post spreads across both columns of the Timeline. Hover over a post and click the star icon to highlight.

16. Posts by others

Posts made by others (fans and non-fans) are in a small box at the top right called Recent Posts by Others. You can scroll in this field without leaving your wall: first click ‘More Posts’ on the lower left of the box and use your mousewheel or the vertical scroll bar. Or click ‘See All’ for a popup box. For viewing and moderating, it’s easier to view these posts on the Posts by Others wall filter, though, as mentioned in #13 above.

17. Default wall

You cannot set a default wall view – it’s always Highlights. I’m seeing a few disappointed page owners talk about this. I tend to agree – the new Timeline for Pages design seems to really favor brands and businesses showcasing themselves vs. making it community-focused. However, with creative use of your cover image and changing it regularly, I believe you can build a wonderful culture of mutual respect between you and your fans. (I’m working on a strategy just now to change up my fan page cover image every 1-3 days; I’m experimenting with montages of featured fans which has been received very well by my Facebook community).
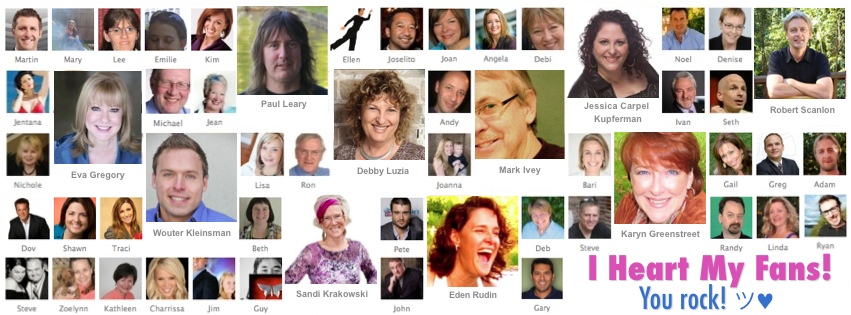
Mari Smith - Facebook Page - Montage of Fans

18. Personalization

Page Timelines are personalized for each person viewing: every page wall includes ‘friend activity’ at the top right where the person viewing will see one post from the past from a friend (or a Facebook user to whom the viewer has subscribed). Frankly, I think this is a complete waste of valuable real estate and I’m already tiring of seeing old (no-longer-relevant) posts repeatedly dredged up when viewing my own page and/or other pages while logged in as my profile. I hope, on the next feature overhaul, that Facebook removes this section and replaces with something more valuable – or enlarges the Posts by others area! That’s my $0.02!
In addition to the one post displayed at the top right of the wall, any Admin or visitor to your page can view your Timeline wall via the ‘Friend Activity’ filter mentioned in #13 above.

19. Adjust photos

You can now reposition photos shared by you or others on your page: hover and click the edit pencil, then click Reposition photo, then drag the image where you want it, and click Save.

20. Messages

Fans and visitors can now private Message fan admins – you can turn this feature off in your settings but it might be a good idea to leave it on to encourage connection from prospects! You cannot initiate messages as your page; you can only communicate via Messages when someone contacts you first. The one drawback of yet another method of communication is that you may need to add more community managers to deal with the increase in emails. You’d be surprised at how many people start to contact you via your page!

21. Admin Panel

It takes several more clicks to get to the various settings of your Page now. You may have to dig deep to find features that were once just one click away. For example, to view your Hidden Posts (posts flagged as spam by Facebook that are only visible to Page Admins, to the person/page who made the post, and to friends of that person) – previously it was ONE click on the Hidden Posts link under your Wall on the left. Now, it’s FIVE clicks to get to the same place! Click Admin Panel > Manage > Use Activity Log > All (upper right menu) > Spam. From there, hover over the spam icon to the right of any post that is not spam, and click Unmark as Spam.
So, those are 21 key points I’ve compiled. I’m sure there are many more to add – stay tuned for additional posts on the subject of the new Timeline for both Pages and personal Profiles. Meantime, here are even more tips and resources to help you on this journey of mastering the latest round of Facebook changes. (I hope your seatbelt is fastened; it’s been non-stop at Facebook HQ for some time now what with the IPO.)

Customize Your Facebook Page – video tutorial

If you’re brand new to the Timeline design for Pages, this handy video by the Facebook team is well worth the 3.5 minute watch:

Facebook’s Page Guidelines and New Timeline Page Tutorial

Unlike many of Facebook’s past product launches and feature upgrades, the company has outdone itself this time with the comprehensive range of guidance for the Timeline design for pages. The following resources are all from Facebook:
  • Plus, for even more guidance, go to www.LearnFacebookPages.com for an interactive course – this is brought to you by Facebook and is very well done! You may need to temporarily disable popup blockers for the course to start.
  • View more Facebook video guides here.
  • Read the revised Page Guidelines here.
  • Download Facebook’s PDF Pages Overview here.
  • Want to read up on how other businesses are creating success with Facebook’s variety of products? Check out this nifty, interactive resource – Facebook Success Stories.

Recommended reading:

You made it down here! Good news – when you convert your page to the new Timeline design, you won’t lose anything. Well, that is, unless you’re a local business with a Place Page, in which case you will lose your Recommendations, for now. I understand they are coming back in the next week or two. Last week I did see that anyone could still write a Recommendation for your business and post to their personal profile to share with their friends – the popup shows upon clicking the Like button. However, I’m not seeing that popup option any more. Plus, the new Timeline design of Place Pages currently has nowhere to display these Recommendations. At least not that I could find. So, it seems Facebook is working on this feature.
Phew, so there you have it!! This turned into a monster blog post, even though I kept saving more in-depth discussion for SO many of these new features – and new optimization strategies – for future posts. Let me know if you found this helpful in the comments below. Is there anything missing? Where are you feeling most stuck?

Facebook 2012 Fan Page Checklist

To download my 14-page Facebook 2012 Fan Page Checklist, just pop your name and email below and I’ll give you instant access to this popular document (over 17,900 downloads!). The checklist part is the first five pages; the rest is all endnotes explaining the elements of your page and how best to set up and optimize for marketing and engagement.
Facebook Fan Page Checklist - Thumnail2
This version is hot off the presses, and includes all the latest Facebook Timeline features
Source: MariSmith.com

Friday, March 9, 2012

50 Social Media Marketing Tips You Must Follow


Social media marketing has at  its core the foundation of valuable, shareable content in all the various forms of rich media whether that be text, video or images.


social media networks

People watch YouTube videos because they are entertaining, educational or just plain funny. Viewers turn up to your Slideshare account and take the time to view a presentation because the content is compelling. LinkedIn works well for personal branding because you are providing answers to your peers to questions in the Q&A section and providing updates that answers problems, informs and educates.
Twitter teases you to click on links that are engaging blog posts or news that is topical and timely. The knowledge economy is all about the content. Facebook is where your audience is online so content needs to be posted and updated to the social giants ecosystem.
So here are 50 synergistic social media marketing tips and tactics to market your content and ideas and help them to spread to a global audience. Apply some of these tips and you maybe surprised in the journey that unfolds as you and your company are discovered and shared and your goods and services are purchased
because you were ‘found’.

The secret sauce behind these tips is to allow you to create a ‘social media synergy’ that totals a sum far greater than the individual parts. This approach is to guide you to go beyond being just ‘Facebook Centric’ and provide substance, endurance and longevity to your on-line presence and digital assets. These tips are also about assisting you in optimizing and integrating the multiple social media platforms listed below
Some of these tips are basic for some but this is a checklist that may assist you in synergizing your online presence and bring traffic and viewers to your global digital properties.

50 Social Media Marketing Tips and Tactics

Blog

  1. Produce inspiring, educational and awesome content that is so compelling that people want to share it, this is the foundation of your marketing. All media is about good content and social media is no different
  2. Write regularly and consistently, people will then come and visit regularly and keep coming back because they know it will be new and topical (that is why magazines have regular publishing time frames)
  3. Learn to write a headlines that make people want to read the rest of your article
  4. Use ‘list’ posts (eg 50 Fascinating Facebook Facts and Figures) regularly. They may be a bit passe for some, but they work and tend to get passed around online
  5. Place a Retweet button on your blog at the top of the posts (WordPress plugins make this really easy to do)
  6. Place a Facebook share  button at the top of all posts
  7. Include a Facebook ‘like box’ near the top right side of the blog so people can ‘like’ your Facebook page even while they are on your blog
  8. Place a LinkedIn share button on your blog (LinkedIn has over 100 million users and they are typically high earners and influential)
  9. Comment regularly on other bloggers in your niche
  10. As you grow your traffic and followers, highlight this on your blog and demonstrate some ‘social proof’. This could even include the number of Twitter followers you have or awards you have won or your website grade or even your Twitter grade
  11. Make it easy for people to subscribe via email (email marketing may be perceived as old school but it works big time!)
  12. Offer to guest post on a another influential bloggers blogs and provide a link back to your blog as part of the agreement
  13. Provide subscribe buttons so people can follow you on your other web properties (Facebook, Twitter, LinkedIn etc)
  14. Provide a subscription button via RSS so people can have your posts pushed to them in their  ’Google Reader’ account after they are published
More reading

Facebook

  1. Update your Facebook ‘Page’ with your blog posts straight after publishing
  2. Provide content and links on your Facebook page that will make them want to share and like your updates
  3. Include Twitter in your menu (This is available as a standard setting on your Facebook fan page)
  4. Run polls using the standard Facebook ‘Question’ feature (above the ‘Write something’ box) to engage your audience and involve them
  5. Link to your Facebook page in your email newsletter
  6. Run a competition on Facebook
  7. Use a reveal tab that is set up as your landing page that provides access to unique content, this could be a video a content or even a voucher
  8. Respond to all comments on your Facebook page in a timely fashion
More reading

Twitter

  1. Acquire  Twitter followers – quantity is important
  2. Engage and develop Twitter followers within your niche using Tweepi (Tweepi.com makes it easy to follow followers of influential bloggers on Twitter) or Twellow.com (Twellow provides a tool that enables you to find powerful Twitter follower lists in your niche) – this is the quality part of the Twitter equation
  3. Share the content of  influential Twitter people and let them know by including their Twitter name eg @Jeffbullas
  4. Automate the tweeting of other bloggers content that you trust and add value to your followers with other peoples articles and content
  5. Tweet regularly and consistently the posts of other influential bloggers in your topic category
  6. Automate the retweeting of your great content so it is not forgotten and buried in the archives (SocialOomph professional can be setup to do this)
  7. When tweeting your posts include # tags that deliver the Tweet to # groups/lists eg #SocialMedia
More reading

YouTube

  1. Interview influential people in your topic category on video and post them to YouTube
  2. Include your website/blog link in your profile
  3. Automate sharing after posting (available under ‘Account settings” then ‘Activity Sharing’ , then choose the social accounts and as a minimum select Facebook and Twitter (Reader, Orkut and MySpace are also able to be enabled)
  4. Write a headline that is ‘keyword’ rich for your industry and niche
  5. Write a tempting and teasing headline that makes the potential viewer want to ‘hit’ the play button
  6. Place a link to your blog at the beginning of each description for each video and make sure you write a description that includes keywords and inviting description
  7. Include keyword tags for each video
More reading

LinkedIn

  1. Use all three website or links that LinkedIn allows in your profile (these can point to your website, blog and Facebook)
  2. Make your LinkedIn profile ‘Public’ in your settings
  3. Pose questions in the Q&A section of LinkedIn with links to your possible answer as a post link
  4. Setup a LinkedIn profile for your blog (not just your personal profile)
  5. Integrate your Slideshare into your LinkedIn account using the ‘Add an Application’ button at the bottom right of your home page
  6. Integrate your Blog post feed into your LinkedIn account using the ‘Add an Application’ button at the bottom right of your home page
  7. Add your Twitter feed into your LinkedIn account using the ‘Add an Application’

Slideshare

  1. Turn your posts into PowerPoint presentations and post them to Slideshare
  2. Write a good headline both on the presentation itself and the Title area
  3. Include keyword tags that would be used to find the presentation
  4. Promote your presentations on Twitter
  5. Allow viewers to download your presentation to assist in making it easy for people to share
  6. Post them to your Facebook page
  7. In choose a license make it  CC (Creative Commons) License so people can use your content and then attribute and link to your blog
What other social media marketing tips and tactics have I left out.
By: Source: JeffBullas.com

Tuesday, March 6, 2012

9 Social Media Hacks We Must Use Daily

Social media isn’t inexpensive, it’s just different expensive. To do it well requires a tremendous time commitment, and regardless of what your life and lifestyle entails, the time you spend on social comes with an opportunity cost price tag. Thus, one of the characteristics that sets adept practitioners of social media apart from less successful adherents is wise use of time.
Using your limited social media time wisely is all about going beyond the obvious activities. If you’re doing the exact same things everyone else is doing in social, I can guarantee you will not have an advantage. But, if you do some things differently, you may find activities where the reward is disproportionate to the effort. These nine efficiencies — hacks — are what you need to embrace right now.


1. Listen to Podcasts

Sure, they’ve been overcome by newer and sexier social flavors du jour but podcasts are still the best way to spend time when you’re not in front of a screen. Driving to work? Listen to Mitch Joel’s Six Pixels of Separation or MarketingProfs’ Marketing Smarts with Matthew Grant . Working out? Put on the earbuds and embrace John Jantsch’s Duct Tape Marketing , or Chris Penn’s Marketing Over Coffee . I’d love to have your ears on my weekly Social Pros Podcast, where we focus on real people doing real work in social media. (you can put your eyes on it too, because we run full text transcripts here).


2. Take and Curate Photographs

I’m not certain if a picture is worth a thousand words, but it’s definitely worth 140 characters. This is the year that photos challenge writing as the lingua franca of the social web: Instagram; Pinterest; Path; Google +  using large thumbnails in the news feed; face recognition technology. All trend lines point toward photography. If you’re not taking and posting pictures to dedicated photo networks and cross-posting (when appropriate) to Twitter and Facebook, you’re missing out on a huge opportunity to grow your network and see the world through the eyes (or cell phone cameras) of thousands of new friends.


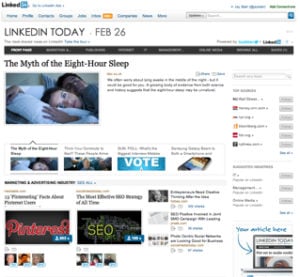
3. Read LinkedIn Today

Today LinkedIn 300x277 9 Social Media Hacks I Use Every DayIt’s pretty safe to say that most people keep their LinkedIn shrubbery more closely pruned than their Facebook or Twitter trees. Thus, when content is shared in LinkedIn, it often has a better chance to have been shared by people you trust, or at least people with a modicum of business sense. That’s why when I’m looking for a summarized source of what’s happening in the categories I care about, I turn to Linkedin Today.


4. Buffer Your Links

One of the most insidious time sucks in all of social media — especially for content curators — is the “Oh, I found something cool. I should share this on a social network or four!” keyboard fire that spontaneously erupts a few times a day. This kills your focus and productivity. The better approach is to set aside a chunk of time first thing each morning to find the handful of truly interesting content bon mots that are worthy, and use Buffer to automatically share them across your chosen social networks at pre-determined, optimized times. While you’re at it, add the Buffer button to your blog too. (disclosure: I’m an investor in Buffer)


5. Use “if this, then that” Recipes

If This, Then That (IFTTT) is the best social tool nobody ever mentions. It’s like a virtual assistant social media robot, where you can create an almost infinite array of conditionally-defined, time-saving tasks. Create an account and hook up all of your social profiles, blogs, cell phone numbers, etc. Then sift through the mountain of existing recipes to find processes that will save you effort.
For example, want your Twitter profile photo to change automatically when you update your Facebook profile photo? Done. Want to have your favorited tweets automatically emailed to you? Done.Want to automatically store your Instagram photos in a Dropbox account? Done.Want to automatically post to your Pinterest board any link you add to Facebook? Done.
The opportunities are nearly endless at IFTTT.com.


6. Create a Stalker List

Grab a piece of paper, or open a new document and write down a list of the 20 people you most want to interact with in social media — people you don’t know, but want to know. Then, create a list for these people on Twitter and Facebook, and a circle for them on Google +. Where applicable, visit their blogs and bookmark them. Also subscribe to their feeds (via email, not RSS because you’ll check your email every day, but not your RSS.) Find them on Instagram, Pinterest, and LInkedin and connect in those places, too.
Done? Starting tomorrow, spend 15 minutes total per day interacting with some of these 20 people. Not in a yucky way, and not in a pandering way. If you have something interesting and relevant to add via Twitter, blog comment, or elsewhere, do it. If you don’t, keep your hands to your sides. But pay attention to your list of 20, and find ways to interact with and help them. In short order, they will recognize you and you’ll have grown and leveled up your network of social contacts. Make a new list every three to six months.


7. Interact on Google +

Let me make this clear: If you’re reading this, you should be on Google +. Not for the SEO benefit — although that’s not insignificant. Not for the entertainment value — although the large number of videos and GIFs there can be a hoot. Do it for the opportunity to interact and engage with industry professionals in a comparatively quiet and efficient location. You want to get on Chris Brogan’sMari Smith’s? Or Brian Solis’s? Google + is the place to do it. It’s Twitter before Oprah; Quora for the masses; blog comments but easier to use. It may not last, but for now Google + is the place to interact with people that no longer answer every tweet.  radar? Or


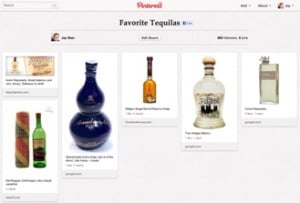
8. Blend Personal and Professional

Favorite Tequilas 300x203 9 Social Media Hacks I Use Every DayQuit worrying about showing your real self in social media. If your social media bios talk only about who you are at work, you’re leaving attention on the table. The reality is that unless you’re a sword swallower or an astronaut, your personal life is more interesting than your professional life. You’re a marketing director for a B2B software company? Yawn. You’re a marketing director for a B2B software company, and you happen to grow prize-winning roses? That, I’ll remember. What you love makes you memorable in ways that what you do cannot. There’s a reason most of my bios say I’m a tequila lover.


9. Quit Obsessing Over Case Studies

How much time do you spend reading case studies, trying to find evidence that social media will work for your company? Case studies should be used for ideation, not ratification. Beyond the fact that case studies are often strategically irrelevant because the company profiled is in a different industry, with different goals, competitors, and customer expectations (among other variances), perhaps the biggest problem with most social media success stories is that the measures of that success are largely without real merit.
Even in the best possible scenario, where the case study in question is extraordinarily applicable to your business goals, social media situation, KPIs, budget, timeline, customer personas, and more (which is a rare alignment indeed), you are placing significant influential value on one outcome. Worry less about what some other company is doing, and worry more about doing your own work.
Social media is too complicated for you to be wasting your time, spinning your wheels on activities and behaviors that won’t make much difference. I know these nine hacks will save you time and propel you forward, because I use them all consistently. But I’m sure I’ve missed many terrific ideas. What are you doing to save time and boost your social media efficiency.
Source: SocialMediaToday.com